Power Tower Dip Station Guide for Pull-Ups, Dips & Core
Power Tower Dip Station Pull Up Bar Stand for Home Strength Training
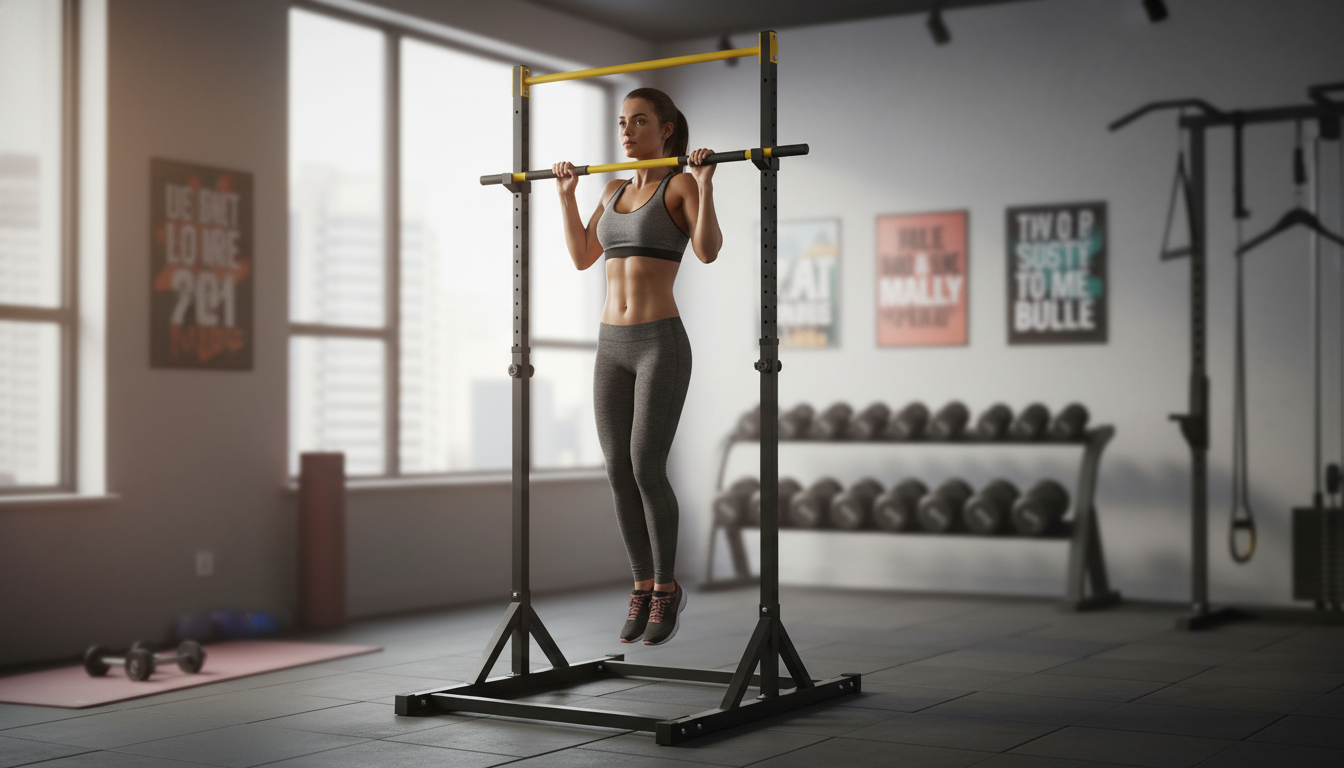
A power tower combines pull-ups, dips, knee raises, and push-up variations in one compact station, making it a practical centerpiece for a home strength setup. With the right setup and a simple progression plan, a single tower can cover upper-body pulling, pressing, and core training without needing a full gym.
If you’re building consistent, repeatable workouts at home, aligning your training with widely accepted activity recommendations can help you stay on track. For general guidance, see the CDC’s adult physical activity guidelines and the American College of Sports Medicine (ACSM) recommendations.
What a Power Tower Helps You Train
A power tower is essentially a “multi-tool” for calisthenics-style strength work. It supports foundational movement patterns that carry over to sports, posture, and everyday lifting.
- Vertical pulling strength: pull-ups and chin-ups to develop lats, upper back, and grip.
- Pushing strength: dips and push-up handles for chest, shoulders, and triceps.
- Core training: knee raises and leg raises to build trunk stability and hip flexor control.
- Posture and scapular control: controlled hangs, scapular pull-ups, and support holds.
- Progressions for all levels: band-assisted reps, negatives, isometric holds, and partial range work.
Because the exercises are closed-chain and bodyweight-driven, it’s easy to scale intensity by changing leverage, tempo, range of motion, or assistance—without constantly swapping plates or dumbbells.
Features That Matter Before Buying
Not all towers feel the same under load. A few practical checks can make the difference between a stable training station and a frustrating wobble-fest.
- Stability and base footprint: a wider base and anti-slip feet reduce wobble during strict, kipping-free pull-ups and deep dips.
- Height and handle adjustability: multiple height positions support different user heights and allow safer dip depth control.
- Grip options: neutral, wide, and narrow pull-up grips add variety and can reduce overuse on wrists and elbows.
- Padding and arm supports: thicker elbow pads improve comfort during knee raises; secure fastening helps prevent shifting.
- Build and finish: solid steel tubing and a durable coating help resist flex and corrosion in garage or basement setups.
- Space planning: confirm ceiling clearance for pull-ups and enough room around the station for safe mounting/dismounting.
Quick Fit Check for a Home Setup
| Checkpoint | What to verify | Why it matters |
|---|---|---|
| Ceiling clearance | Enough space to hang without head contact; allow extra for full extension | Prevents cramped form and accidental impacts |
| Floor contact | Feet sit flat; no rocking on tile/wood; consider a mat | Improves stability and protects flooring |
| User height match | Pull-up bar reachable; dip bars allow comfortable shoulder position | Reduces joint strain and improves range of motion |
| Movement room | Clear area around the tower for mounting and dismounting | Reduces trip hazards during fatigue |
| Accessory plan | Bands, straps, or ab straps if needed | Enables progressions and comfort upgrades |
Safe Setup and Use Tips
A power tower is simple equipment, but it still deserves “equipment-level” attention. A few habits keep training smooth and reduce the chance of tweaks.
- Assemble on a level surface and re-check all bolts after the first few sessions; vibrations can loosen fasteners over time.
- Use a non-slip mat under the station on smooth flooring to reduce shifting and protect surfaces.
- Start with controlled reps: avoid swinging until strength and shoulder stability are established.
- Keep shoulders active during hangs: avoid a fully relaxed dead-hang if it causes discomfort; use scapular engagement as needed.
- For dips, limit depth to a pain-free range; keep elbows tracking naturally and avoid shrugging.
- Warm up wrists, elbows, and shoulders with light mobility and scapular drills before heavier sets.
One simple rule: if a rep forces you to “steal” motion from the neck or lower back (shrugging into the ears, rib flare, or aggressive arching), reduce the range and build clean control first.
Workout Plans Using a Power Tower
These templates focus on repeatable progress without overcomplication. Keep 1–2 reps in reserve on most sets at first, then build volume or intensity gradually.
Beginner (3 days/week)
Intermediate (2–4 days/week)
Goal tweaks that work
Care, Maintenance, and Small Upgrades
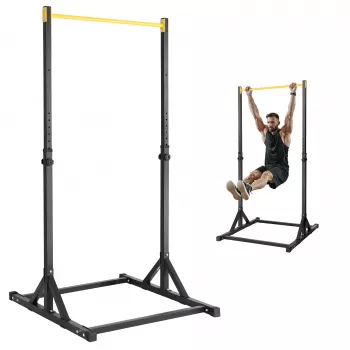
Product Spotlight: Power Tower Dip Station Pull Up Bar Stand
If you want one station that covers the essentials—pull-ups, dips, and core work—the Power Tower Dip Station Pull Up Bar Stand is built for home training where versatility matters more than filling a room with machines. It’s especially useful for progressive calisthenics: you can start with band assistance, negatives, and support holds, then progress to full reps and added load over time.
For comfort during warm-ups, cooldowns, or mobility work between sets, supportive training apparel can help you stay consistent—especially in cooler garages or basements. The Women’s Long-Sleeve Yoga Jacket & High-Stretch Fitness Set pairs well with home workouts that mix strength and stretching.
FAQ
Are dip stations safe for shoulders?
Dips can be shoulder-friendly when you keep the range of motion pain-free, avoid shrugging, and maintain controlled shoulder depression. If discomfort persists, reduce depth, slow the tempo, or use push-up variations while you build pressing strength and shoulder stability.
How much space is needed for a power tower?
Plan for the tower’s footprint plus clearance on all sides for safe mounting and dismounting, and make ceiling height a priority so you can hang at full extension without contact. On smooth floors, a non-slip mat helps prevent shifting and protects the surface.
What if pull-ups are too hard at first?
Start with band-assisted pull-ups, slow negatives, scapular pull-ups, and timed active hangs, then add reps over 4–8 weeks as control improves. A simple approach is 2–3 sessions per week: 3 sets of assisted reps plus 2–3 negative singles, increasing total clean reps gradually.


Leave a comment